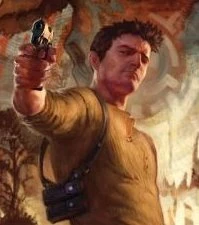
Template:Appearances Nathan "Nate" Drake (born Nathan Morgan) is the main protagonist and playable character of the Uncharted series. A former professional treasure hunter, Nate is described as a "deep-sea salvage expert and action-pro." Since childhood, Nate and his older brother Sam have held the belief that they are descended from the famous English explorer Sir Francis Drake.
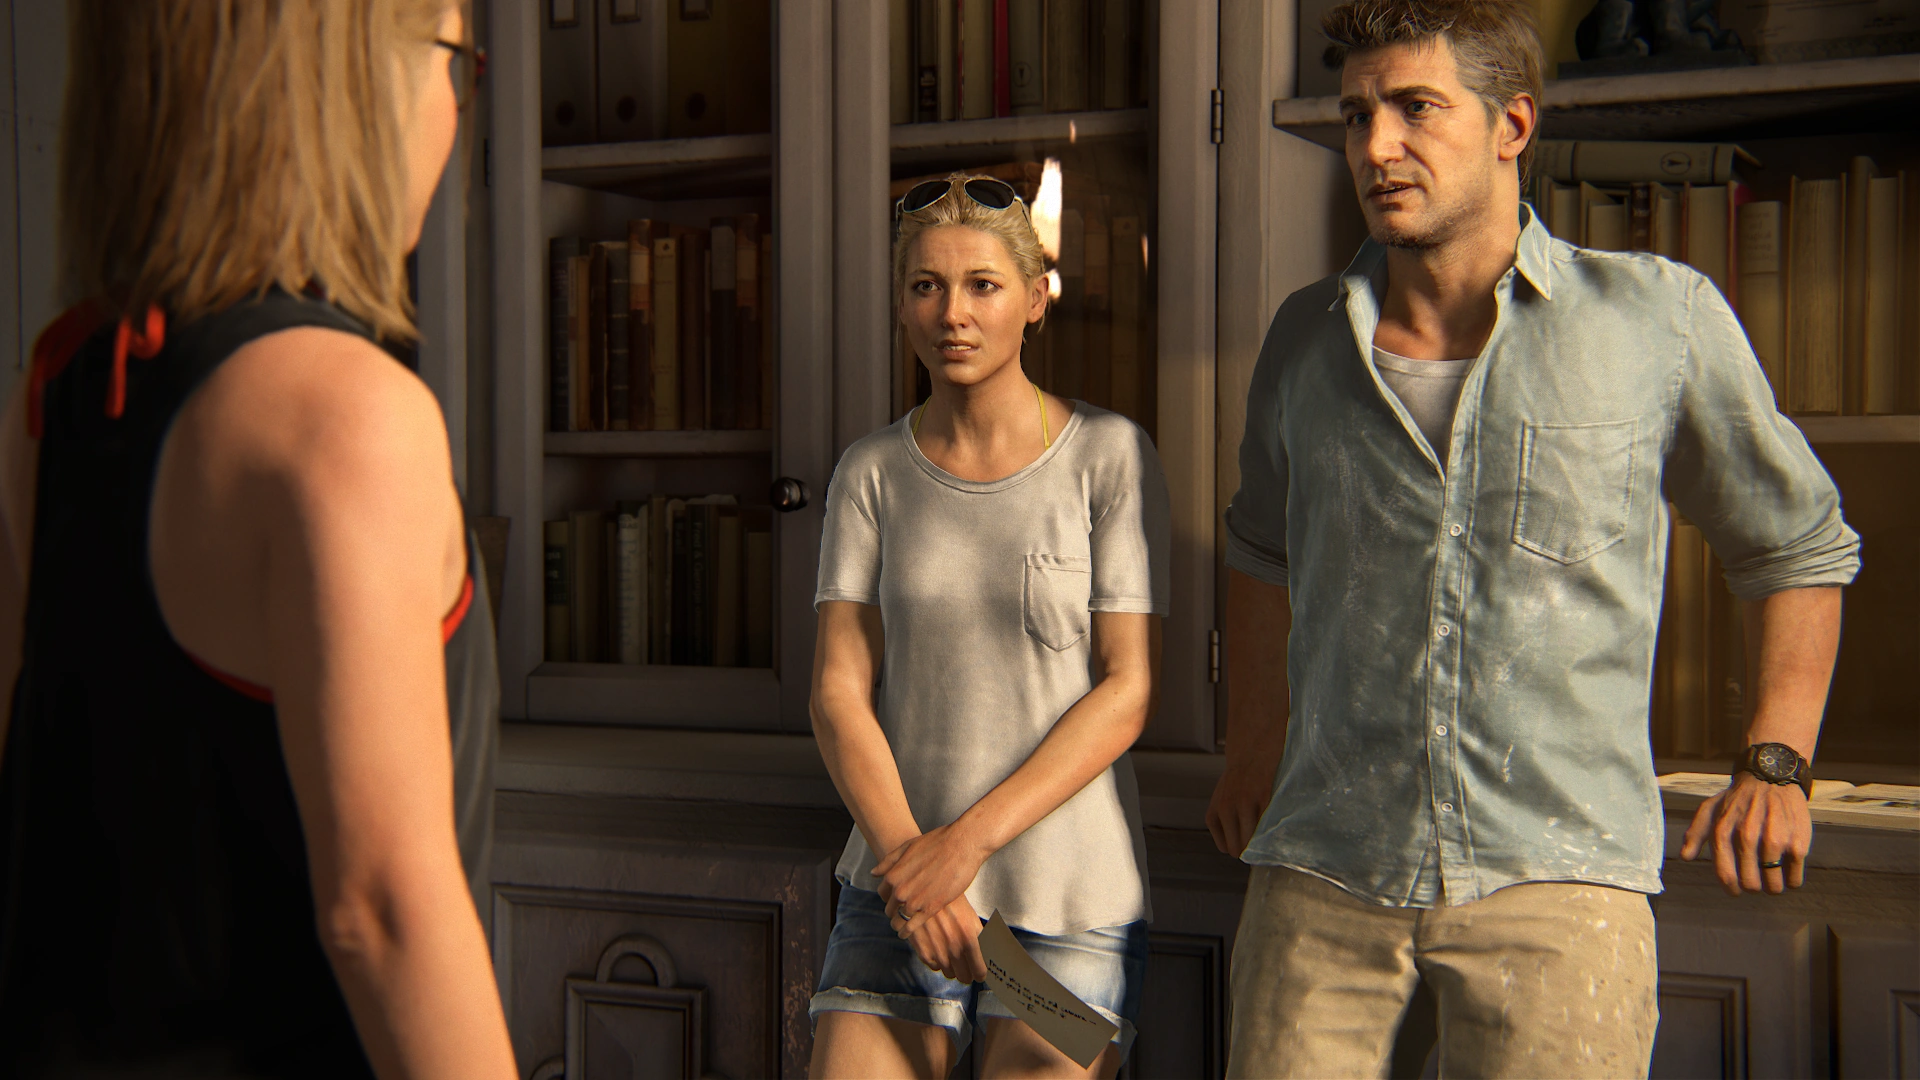
As of the events of Uncharted 3: Drake's Deception, Drake is married to Elena Fisher, and after the events of Uncharted 4: A Thief's End, Drake has a daughter, known as Cassie Drake.
Nate is portrayed by Nolan North.
Biography
Early life
Nathan Morgan was born somewhere in 1976[1] to Cassandra Morgan, a talented archaeologist and historian and an unnamed father. Nate grew up alongside his older brother Samuel, who were both educated by their mother in the legends of Sir Francis Drake. At a young age, Cassandra later succumbed to an unknown illness and eventually committed suicide. Following her death, their father struggled to support the boys and as a result were constantly moving from various houses.
By the age of five, Nathan and his brother Sam were relinquished custody by his father to the state. As a result, the brothers were placed into the Saint Francis Boys' Home,[2] where they were raised by nuns whom taught them Latin.[3] At the orphanage, Nathan frequently got into fist fights with the other children who resided there because of their frequent insults towards Nathan's family and Nate himself.
Nathan Morgan at 13 years old after a fight before leaving the orphanage in A Thief's End.
Years later, Sam was kicked out of the orphanage due to criminal activities he committed. Nathan, who was left at the orphanage after a fight with a fellow orphan, runs away from the orphanage when his brother returns with a lead to whom their mother's effects were sold to. They arrived at the location where Sam had tracked their mother's effects and infiltrated the building. They later found their mother's journals but were confronted by the manor's owner. The old woman then realized who the two boys are and revealed that their parent's used to work for her as their mother was a historian and their father was an explorer.
She stated that they both shared a belief that Francis Drake had heirs. The old woman then proceeds to give Nathan their mother's journal, believing that he and his brother could finish their parent's work before passing away shortly afterwards. The police then arrive in response to the brothers' break in and chase after the Morgan brothers. Nathan and Sam manage to outrun them and escape on Sam's motorcycle. The two stop for a moment to catch their breath and realize that they are now fugitives and cannot go back to their lives. Sam, believing that they are destined for greatness, suggests that they abandon their former lives and continue their parent's unfinished work with new identities. In honor of their mother's belief that Francis Drake had living heirs, they adopt the "Drake" surname.
A teenage Nathan Drake as he appears in Drake's Deception.
Throughout the following years, Nathan began documenting and investigating several leads to Francis Drake's explorations, where by the age of fifteen this knowledge eventually led him to Cartagena, Colombia, where the Maritime Museum was holding a Francis Drake exhibit.
Upon entering the museum, Nathan discovered that among the several exhibits was Francis Drake's ring and astrolabe. Nate's intention was to steal the ring, though stated he was there to "reclaim" it, as it belongs in his family. While making preparations for the theft, he encounters both Victor Sullivan and Katherine Marlowe. Sullivan had been hired by Marlowe to steal the ring, and a confrontation ensues when both parties attempt their heists at the same time. After Marlowe ordered her men to kill Nate, Sullivan turned against her and helped Nate escape. They strike up a friendship, and Sullivan, impressed by Nate's skills and potential, becomes both a mentor and father figure to Nate.[4]
At fifteen, soon after meeting Sullivan, Nate was sent to prison, though Sully had him released.[note 1]
1991–1992
As Nate and Sully's respect and relationship begin to grow within a year of meeting each other, Sully's words stick with Nate about how he still has a lot to learn when he gets himself locked up in prison. Sully, who stood true to his words, bailed him out of the situation. This showed Nate how much Sully cares for him.
1999–2000
On the trail of pirate Captain Henry Avery's treasure, Nate, his brother Sam, and rich fortune hunter Rafe Adler bribe their way to be imprisoned in a Panamanian jail. The warden, Vargas, takes Nate to the old Spanish prison tower where Joseph Burnes, Avery's shipmate, was imprisoned. Before Nate could explore the tower, Vargas learns of their intentions and demands a cut from the treasure. Inside Burnes' cell, Nate discovers a cross of Saint Dismas engraved with Digna factis recipimus. Sam suggests that the cross points to a cathedral in Scotland named after Saint Dismas; it is also where Avery was last sighted.
Vargas demands a quarter portion of Avery's treasure, but Rafe kills him and takes his weapon. The guards sound the alarm and the three flee the prison. Nate and Rafe make it to the prison walls, but Sam was shot before he could successfully scale the wall and fell to his presumed death. Rafe desperately urges a distraught Nate to escape as guards close in and Nate reluctantly gives in. The two escape in a boat provided by Vargas and leave Sam in the prison for the next thirteen years.
Rafe, using his inherited fortune, buys the Saint Dismas cathedral and the surrounding land. For years, he and Nate have excavated the ruins hoping to find Avery's treasure but to no avail. Nate, still distraught from his 'loss', abandons Rafe and buries the memory of his brother.
2000–2001
Ten years prior to Uncharted: The Fourth Labyrinth, Nate and Sully pay a ship's captain to take them and their cargo from Valparaiso to the United States. They then discover the ship is on a drug smuggling run. Nate being the man he is, decided to throw the drugs overboard, until Sullivan manages to talk him out of it (this could be because of them getting paid by the unknown contact in the United States).
Both Nate and Sully take some time out of treasure hunting to relax in Costa Rica.
Uncharted comic
Nathan in the Uncharted comic.
Nate and Sully have been contracted by siblings Michael and Rose Ludlow to steal a book. Nate carries out the theft with Harry Flynn, and after narrowly escaping with their lives, Nate lets Flynn keep the gold that they stole with the book. Flynn leaves, and Nate becomes intrigued by the book, which is written in code. As they have time before the handover, Nate cracks the code, and discovers that the book is in fact the journal of Sir Richard Byrd. The journal describes how Byrd was hired by the Russians towards the end of the World War II to hide the Amber Room – a treasure consisting of several polished amber panels.[5]
Byrd hid the Room in the underground city of Agartha, which he had discovered on an earlier flight to the Arctic. The coded coordinates of the entrance to Agartha were engraved on the Amber Seal, a panel from the Amber Room that Byrd had taken to prove that he'd had it.
However, the seal was lost in the war. Nate and Sully then meet with the Ludlows to hand over the journal. The pair take an interest in Nate's ancestry, and let it slip that they plan to acquire the Amber Seal at an auction. Sully and Nate resolve to steal the Amber Seal and find the Amber Room before the Ludlows do.[5]
Using Sully's underground contacts, they discover that the Amber Seal is being auctioned at Volkov Castle by its owner, Russian crime lord Mykola Rusnak. Nate and Sully plan to break in and steal it. While performing a recce of the castle, Nate narrowly escapes from Chloe Frazer, who attempts to kill him.[5]
Nate is caught as he attempts to steal the seal during the auction, however Chloe convinces Rusnak to let Nate go. After learning that the seal will not be sold until the next day, Nate and Sully return to the castle that night and break in. While Sully remains outside, Nate enters the castle, where he runs into Chloe. They agree to a brief truce and work together. Nate manages to get the coded coordinates off the seal before Chloe lifts it off its podium, triggering an alarm. As they escape, Chloe leaves the Seal with Nate as she flees.[5]
Upon exiting the castle, Nate is taken to a secure location by the Ludlows, who have also kidnapped Sully. The Ludlows reveal that they are descendants of Thomas Doughty - a friend of Francis Drake who was executed for treason on Drake's evidence - and they want revenge. After getting Agartha's coordinates from Nate, they leave Nate and Sully to their fate at the hands of Rusnak. Despite Rusnak's attempts to extract the coordinates from them, the pair are rescued by Chloe, and the three agree to work together. Sully remarks that Nate is only allowing Chloe to help because Nate is attracted to her.[5]
As the trio attempt to take the Seal and journal back, the Ludlows take Chloe hostage and force Nate to fly them to Agartha, knowing that the coordinates Nate originally gave them were wrong. They fly to the Arctic.[5]
After the plane is damaged while landing in turbulence, the group find themselves in an underground cavern, surrounded by the remains of Byrd's camp. Sully is ordered to stay behind and fix the plane, while the rest advance. They find the Amber Room, which is smashed and worthless. Angered, Micheal attempts to kill Nate, who escapes with Chloe into the city of Agartha. Michael and Rose catch them and in the standoff they are ambushed by the Smoking Gods.[5]
Escaping from the Smoking Gods, in the central cavern of Agartha, the group discover several flying machines, along with the Second Sun - a wall of shining diamonds. Michael wants to get an army to stake a claim to Agartha, but Rose refuses and shoots him, before removing a single large diamond from the wall. This causes a breach and allows lava to begin flowing through, flooding the city. Rose is incinerated.[5]
Nate and Chloe escape with Sully in the plane that they arrived in, although it is caught in the volcanic eruption and crashes into the sea. The trio wash up in an unknown tropical country, and they take the opportunity to relax. While Sully chats up beautiful young women, Nate and Chloe spend the night together, and when Nate wakes up in the morning he finds a message from her - "See you around, cowboy. No regrets." It is revealed that her true motivations were to capture images of the flying machines of Agartha for her employer: Roman.[5]
Nate and Sully meet at the dock the next morning, with Sully observing that they probably haven't seen the last of Chloe. In the meantime, he's got a job lined up for them in the States. The two set off on a rusty boat - which was all Sully could afford as they didn't exactly walk away from Agartha with a lot of treasure. Nate points out that they did walk away - sometimes that's enough.[5]
Uncharted: Golden Abyss

Nate in Golden Abyss.
At an unspecified time before Drake's Fortune, Nate has been hired as an expert by Jason Dante to investigate a dig site on a ridge in central Panama. At the dig site, they encounter Marisa Chase, Dante's "partner," who, as a result of her distrust, had tailed them. Dante receives an erratic radio call from Roberto Guerro, the leader of a revolutionary army based in the surrounding forest, and leaves, while Chase helps Nate examine the dig site, both unimpressed that Dante had not informed them about Guerro's presence. They find the remains of a group of Spanish conquistadors who were murdered - poisoned by forces unknown.
The only clue to why the soldiers were killed is a grave marker carved with a symbol Nate recognizes as being of Visigoth origin. Chase reveals to Nate that she possesses an Amulet that Dante doesn't know about, and refuses to let Nate examine it unless he agrees to her offer of partnership. Before they can learn more they are interrupted by the arrival of Guerro's men. As Chase refuses to use a gun, Nate kills them all and the two attempt to escape. It is revealed that Dante has been working with Guerro. Nate tries to escape by attacking the soldiers, but is knocked unconscious.[6]
Nate wakes up in a burning warehouse. Escaping, he finds himself in a shanty town that acts as Guerro's base, and meets up with Chase. She explains she escaped Guerro after a brief interrogation, and set the warehouse alight as a diversion. Nate decides to rescue Dante and escape, but Chase refuses to leave without her Amulet, so reluctantly Nate agrees to help her retrieve it. After defeating a number of Guerro's guards, they reach his office where they learn that Dante has already cut a deal with him, and given Guerro all the research he and Chase collected. Nate and Chase retrieve the Amulet from Guerro's office and narrowly escape the compound while being shot at.[6]
Chase takes Nate to the house of Vincent Perez, her grandfather, and explains that he found the Amulet among the ruins on the ridge, and spent twenty years trying to figure out what it was. The year before, he was diagnosed with terminal cancer, which made him desperate to solve the mystery. He contacted Dante, who was able to negotiate with Guerro for access to the site, but three months ago he disappeared, and Dante took over the excavation. In Perez's study, Nate discovers a symbol from the grave marker on the cover of a book about the Sete Cidades, an obscure Christian religious order with roots stretching back to the Visigoths.[6]
When the Islamic Moors invaded Spain in the Eighth Century, seven Spanish bishops set sail with the treasures of Spain. Apparently they went on to find the seven cities of gold, and the Sete Cidades was an order dedicated to finding these cities. Using Perez's research, Nate is able to translate the words written around the edge of the symbol, "The Sword of Stephen shall bear witness to our sacrifice in the Chamber of the Seven Fathers." Perez also noted that this Chamber would have been a holy place, a sanctum for the secrets of the Order, and a potential location for it. Nate accepts Chase's earlier offer to be partners as they depart.[6]
Arriving at this location - Spanish ruins next to a large sinkhole - Nate and Chase enter catacombs at the bottom of the sinkhole and find the Chamber of the Seven Fathers, along with Perez's camp and his journal. The journal sheds more light on the Sete Cidades, specifically referring to Frair Marcos de Niza, a Spanish priest who was also a High Priest of the Sete Cidades, who was noted for claiming to have discovered the Seven Cities of Gold. As it turned out, Marcos lied, and his seven cities were simply native American villages. While they are investigating, they are ambushed by Guerro's men, who had followed them. Nate kills them and insists they hurry it up.[6]
When the journal refers to Marcos' guide, Esteban the Moor, Nate realizes that the Sword of Stephen is the sword of Esteban. After solving a puzzle, Nate and Chase discover Esteban's tomb and find the body of Vincent Perez inside. While Chase mourns for her grandfather, Nate takes the Sword of Stephen. Engraved upon the blade are symbols, which Nate takes charcoal rubbings of before he returns to Chase. He tells her that, when they find Quivira, it will be Perez's discovery, but she turns him down - it will be their discovery, as partners.[6]
They are interrupted by the arrival of Dante, who takes Chase hostage right before Guerro arrives in time to hear Dante insult him. Guerro then calmly drops Dante off a balcony, and forces Nate to hand over the Sword of Stephen while he leaves with Chase as a hostage. Dante regains consciousness, as the fall wasn't fatal, and he and Nate work together to escape the sinkhole that was rigged with Guerro's explosives. They kill a multitude of Guerro's men trying to save Chase before she is taken, but when they finally get out of the sinkhole, they are too late. Dante vows to go hire his own army and go after Guerro while Nate seeks help from Victor Sullivan.[6]
Nate has assembled the charcoal rubbings of the symbols on the Sword of Stephen, revealing a map to the location of the Temple of the Serpents, which Friar Marcos stated "guards the gateway to hell." Nate and Sully make their way to the Temple while Dante's mercenaries fight Guerro's revolutionary army. Along the way, Sully falls down a hole and injures his leg. He suggests that Nate should go on alone, while he steals a helicopter to be their getaway vehicle.[6]
Nate continues alone to the Temple of the Serpents, where he learns that Dante's mercenaries have Guerro trapped in the lower caverns. Nate descends to a large doorway at the base of the cave where Guerro's men have Chase captive. They are setting up explosives on the supporting columns of the cavern. After Nate deals with them, Chase refuses to leave - Quivira is just behind the door. Nate realises that her Amulet is in fact the key to Quivira, and uses it to open the combination lock on the door.[6]
Beyond the doorway, they gain access to the Golden Abyss. This cavern has numerous enormous veins of gold all over its walls, and in the centre is the Throne of Gold. Sitting on the Throne is the corpse of Esteban, impaled through the heart with the dagger of Marcos de Niza. Esteban was a Sete Cidades offering, a sacrifice of blood to seal the gates of hell.[6]
A Geiger counter in Chase's pack indicates that the gold is radioactive. Dante arrives and reveals he knew about the treasure being radioactive and plans to strip-mine Quivira and litter the gold through the black market. Nate and Dante get into a fist-fight with Nate being the victor. Nate and Chase leave Dante by the Throne of Gold, and Chase detonates the bombs in the caverns to seal it. As she and Nate flee, the caverns begin to collapse, killing Dante and any of his mercenaries still in the cave system. As they reach the exit, Guerro appears and fires an RPG into a stone column, causing it to collapse and fall onto Chase's leg. Guerro reloads the RPG and says he has only one cause left without his army: to die with honor. Nate confronts Guerro and he is able to trick him into charging out onto a burning bridge, which collapses and plunges the General into the abyss.[6]
Nate returns to Chase and manages to lever the stone block off her leg, before the two flee to the exit - where they find Sully waiting with his helicopter to winch them out. They land to splint Chase's leg, and while Sully checks the chopper has enough gas to get them home, Nate reveals he saved Chase's Amulet. She takes it, and hurls it into the jungle, stating that Marcos was right - it belongs in hell. Sully interrupts before the two can kiss, and as they head back to the helicopter he begins telling them his story about the nurses in Buenos Aires. Again.[6]
Uncharted: The Fourth Labyrinth

Nate on the cover of The Fourth Labyrinth.
At an unspecified time before Drake's Fortune, after completing a job in Ecuador (stealing the Staff of Ayar Manco and rescuing hostage Alex Munoz from drug runner Ramón Valdez), Nate is called to New York by Sully to investigate the murder of Sully's old friend Luka Hzujak. Sully wants to help Luka's daughter (and his god-daughter) Jada find out who killed Luka and why. Nate agrees to help, and learns that before his death Luka worked on a secret project for weapons company Phoenix Innovations, supposedly on the trail of a lost treasure. From what Luka told Jada before he died, the project has something to do with the ancient labyrinth on Crete, the source of the Minotaur legend, designed by Greek mythic figure Daedalus.[7]
They go to an exhibition on ancient labyrinths at a nearby museum to speak to an expert, Dr Maynard P Cheney, and arrive seconds after Cheney was stabbed to death. A graduate student, Gretchen Welch, explains that Luka spoke to Cheney about an excavation in Egypt where her brother is a site manager before traveling out there. She confirms that Luka believed both labyrinths were designed by Daedalus, and that Luka also believed there was a third. After they depart the museum, their attempt to search Luka's apartment is derailed when the entire building burns down. Following an attempt on their lives immediately afterwards, they leave America for the next step on the trail - the dig site in Egypt.[7]
In Egypt, a search of the hotel room where Luka stayed on his visit reveals his journal, concealed within an air conditioning unit. It confirms Luka's theories surrounding Daedalus and the Mistress of the Labyrinth, and states that Tyr Henriksen is not interested in the first three labyrinths - he wants the treasure in the Fourth. That night Nate, Sully and Jada have dinner with Ian Welch, who agreed to meet them after the call from his sister, and he explains that Luka's theories are supported by evidence from the dig site, including references to alchemy, a mysterious honey, and how the Mistress of the Labyrinth received more tribute than all the other gods combined.
The dinner date is interrupted when Jada's stepmother, Olivia, arrives looking for her. She claims to be concerned for her and afraid of Henriksen, but Jada refuses to speak to her and marches out of the restaurant when Nate and Sully invite Olivia to talk. Nate follows, and finds Jada being kidnapped by suited men. In the ensuing fight, men dressed in black hooded robes appear and kill the thugs, warning Jada to "go home". In the confusion, Ian left having agreed to get them into the dig, and Olivia mysteriously disappeared.[7]
Nate, Sully and Jada meet Ian the next day at the dig site – The Labyrinth of Sobek – and learn that Tyr Henriksen has taken over funding of the dig and is being shown around. They have time to examine the central chamber while Henriksen views the above-ground facilities, and while they do so Nate uncovers references to the Minotaur and a secret passage beneath the altar. Inside, they find a deformed human skeleton wearing a horned headdress, and three separate worship chambers each dedicated to different gods and decorated with ancient scripts.
The chamber dedicated to Sobek is decorated with Egyptian hieroglyphics, while a chamber decorated in Cretan script (or Linear A) is dedicated to Dionysus, obviously representing the labyrinth on Crete. The third chamber, however, is decorated in a script Ian deduces to be an unknown variant of the Linear B script, and what he can translate reveals the chamber is dedicated to Poseidon, and the third labyrinth is on the island of Thera. They are interrupted (again) by an attack by the hooded men, who kidnap Ian and drive the others back to the altar chamber, where Tyr Henriksen, Olivia and security guards await them. Jada pretends to be glad to see Olivia, and convinces them to let her go outside for some air, escorted by Nate and Sully.[7]
As soon as they leave the labyrinth, Nate, Sully and Jada leave the dig and go straight to their car. They travel to the Santorini archipelago in the Aegean Sea, all that remains of Thera after a volcano on the island erupted. Using Luka's journal, they find the entrance to the third labyrinth beneath a medieval fortress, as well as the safe route towards the centre. Along the way, they find extensive damage to the labyrinth by the eruption and successive earthquakes, which has allowed the sea to flood some caves. At one point, they are forced to double back - and find that Henriksen, Olivia and some thugs have been following them. Henriksen is shocked by their accusation that he murdered Luka, and reveals he thinks it may have been another warning to "go home." He also admits that Olivia's charade about being afraid of him was a ploy to try and find out what they knew.[7]
Henriksen is about to order Nate, Sully and Jada to lead them to the center at gunpoint, when they are again attacked by the hooded men. This time, however, they kidnap Sully and drag him deeper into the labyrinth. Nate and Jada immediately pursue them, following them all the way to the central chamber, where they ultimately lose their quarry. Nate opens the secret door, hoping to find evidence of the Fourth Labyrinth. Like in Egypt, there are worship chambers in the secret passage, although two of them have collapsed into a sea cave. However, while in Egypt there were only three chambers, here there are four. One of the two is dedicated to Dionysus, while the other is dedicated to an unknown god and decorated in Chinese writing.[7]
Henriksen's group catches up with them, and while Olivia examines the chamber Nate agrees with Henriksen to settle their differences later. Olivia deduces the Fourth Labyrinth is in China, and is based on the Chinese hell - Diyu. She theorizes that all the treasure was moved there after Daedalus was chased off Crete, the priests abandoned the Labyrinth of Sobek and the volcano destroyed Thera. As the treasure was moved, the fourth chamber was built to honor the fourth god, although something stopped Daedalus adding four chambers to the other two labyrinths. The discussion is interrupted by a rumbling throughout the labyrinth, as the hooded men detonate explosives to collapse the medieval fortress over the entrance and trap them within. Nate, however, realizes there is another way out and leads the others to the sea cave. He stows a radio and his clothes in a waterproof pack, and swims out alone to find a safe path. Once he finds one leading out to the open ocean, he goes back and helps the others get out.[7]
Together, Nate and Jada travel with Henriksen and Olivia to China, and they share their research. Daedalus was a con-man, who would convince kings and priests to let him build the labyrinth as the ultimate treasury - only to steal the gold once it was safely placed in the centre. While the labyrinth on Thera was being built, a fourth ruler fell for the con and ordered construction of a fourth labyrinth in Yiajing, China - modern-day Nanjing. However, Daedalus died before construction of the fourth labyrinth was complete, so his nephew Talos took over the con and must have halted the addition of four chambers to earlier labyrinths. He altered the design of the fourth labyrinth and demanded an army of slaves to build it. Olivia also reveals that a flower motif discovered in earlier labyrinths represents the extinct plant White Hellebore, but they don't know it's significance in relation to the labyrinths.[7]
Before they land, they discover that their co-pilot has been somehow brainwashed by the hooded men to kill both the pilot and himself, but Henriksen is able to land the plane safely and they are eventually released by Chinese police after the intervention of staff from the Norwegian and American embassies. A call to one of Nate's contacts, Margaret Xin, reveals a likely location for the Fourth Labyrinth - the only place in Nanjing without underground transport tunnels is an ancient site where excavation has been banned by the Chinese government. Using Luka's journal, the photos from the worship chambers and the historical record, they find the entrance to the labyrinth and Nate deduces that the path to the centre will be marked with tracks from dragging all the gold there. Along the way, they find that the extinct White Hellebore is still alive and well within the labyrinth.[7]
In a cavern with a mural showing the Mistress of the Labyrinth offering seven slaves a chalice, Olivia plays her hand and reveals the mercenaries Henriksen hired have been loyal to her all along. In the midst of an attack by the hooded men - or the Protectors of the Hidden Word - Nate, Jada and Henriksen escape together, and Henriksen explains he's been researching the labyrinths for years. The White Hellebore is used to make a solution, the honey, that can render a man docile and obedient, but will sometimes trigger mutations when ingested - creating the Minotaurs. This honey was also known as the Hidden Word, and he thinks Daedalus used it to con workers into believing he was paying them in gold to reinforce the idea he was valuable to rulers. The treasure Henriksen was searching for was the secret of the White Hellebore, to sell it to the highest bidder, while Olivia will probably use it to make rulers her puppets. Nate, Jada and Henriksen decide to continue to the center, each for their own reasons.[7]
As they close on the center, they come under attack from six Protectors, one of whom is immediately killed by Henriksen, revealing his identity as Ian Welch - brainwashed with the honey to protect the labyrinth. Nate is attacked by Sully, also brainwashed, and the two tumble into an underground river where they fight. Nate knocks Sully out and carries him to the bank while Jada and Henriksen deal with the other Protectors before carrying Sully further into the labyrinth, to the center. Jada opens the secret passage - and the Minotaur charges out to attack. Olivia arrives and orders her mercenaries to fire upon it. At this point, Sully has woken up, but remains disorientated, and Nate and Jada drag him into the secret passage. There they find the last Mistress of the Labyrinth, ministering to a dying Minotaur. She orders her guards to attack, but Nate and Henriksen hold them off long enough for Olivia to kill the younger Minotaur and come to them. She and her last few mercenaries kill the guards, only for the Mistress to attack and kill Henriksen before being shot herself.[7]
Olivia examines the chamber, looking at the gold piled around the walls, and the three tombs in the center. She picks up a gold Minotaur statue, which triggers a trap and floods the secret chamber. Sully, now more aware and back to his old self, pulls Jada out of the chamber while Nate goes after Olivia. However, the Minotaur seizes her and drags her beneath the water to drown, while Nate escapes. Nate, Sully and Jada leave the labyrinth, aware nobody else will discover it and the White Hellebore while the ban on excavation remains in place.[7]
Soon after, Nate, Sully and Jada attend Luka's funeral in New York. As Jada leaves to talk with her relatives after thanking Nate and Sully, Sully tells Nate about a friend's cousin who recently left the Vatican, and brought with him a map to the lost Inca city of Paititi. Sully states that, if anybody were to find Paititi, he'd rather it be him and Nate. Nate agrees - it looks like they're headed to Peru.[7]
Uncharted: Eye of Indra

Nate in Eye of Indra.
Nate is hired by crime lord Daniel Pinkerton to locate the Eye of Indra, the third and final piece of the treasures of Indra. Pinkerton's collection already contains the other two pieces - the Path of Indra and the Wrath of Indra. Nate accepts the job, knowing that we will be compensated handsomely.[8]
Nate looks over Pinkerton's documents in a bar, two thugs came up and told him the bar is not a library but Nate ignored them and they threatened him but as he fights them, one goon points a gun at him but is saved by the bar's owner, Rika. As they left, Nate asks for Rika's help translating the documents in exchange for paying for the broken table when Nate punched one of the goon's at it. They discover that the Eye of Indra is in fact hidden within the other two treasures, which are locked inside Pinkerton's safe. Rather than inform Pinkerton that he already has the Eye, Nate chooses to steal the artifact from him.[8]
Nate and Rika spend the night together, and the next morning Rika reveals she has already got somebody to help them with the theft. Nate is unhappy about this, but while they argue, armed pirates storm the room and apprehend them.The pirate's leader is revealed to be Eddy Raja, Nate's old rival. It is revealed that Eddy is Rika's brother, and she has asked him to help them with the theft. Eddy becomes enraged when he realizes that Nate and Rika have slept together, and he threatens to kill Nate.[8]
After Eddy calms down, the trio make their plans for the theft. Nate demands that they follow his rules if Eddy is to help. After her brother leaves, Rika apologizes to Nate for involving Eddy, and asks Nate how he knows him. Nate explains how Eddy had planned to double-cross him on a previous job, but he had "beat him to the punch."[8]
The three gather outside Pinkerton's mansion at night, ready for the heist. Eddy and Nate persuade Rika to stay behind and cover them. To create a distraction, Eddy blows up Pinkerton's cars, and they he and Nate into the mansion amid the confusion.[8]
Nate and Eddy are discovered soon after entering the mansion, and are pinned down with barely any bullets left. After their final detonator fails to open the safe, Nate quickly devises a plan, and they allow themselves to be captured. They tell Rika to do the same, and hide Eddy's gun underneath a table. Pinkerton tortures the two, and eventually brings in Rika as a bargaining chip. Once Rika is in the room, Nate tells Pinkerton that the Eye is in his safe. With Pinkerton briefly distracted opening the safe and looking at the Eye of Indra, Rika breaks loose and take's Eddy's gun from beneath the table. She shoots Pinkerton, wounding him. Nate explains to Pinkerton that after their detonator failed, being captured and getting him to open the safe was the only way they could get the treasure. Rika then summarily executes the wounded Pinkerton.[8]
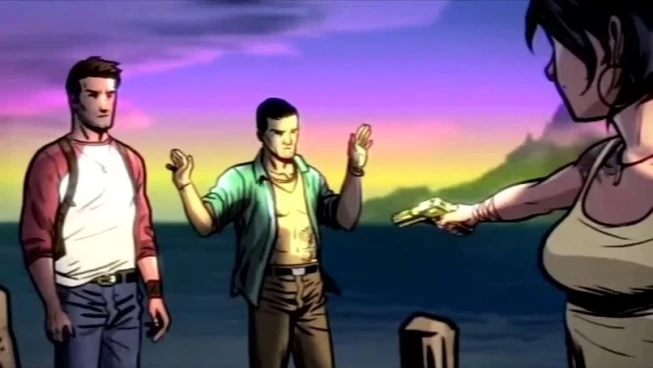

Rika betraying Nate and Eddy in the Eye of Indra.
Later, the trio stand at a dock discussing a fine job. However, Rika betrays both Nate and Eddy by taking the amulet for herself, holding them at gunpoint and repeating Nate's earlier statement, that she simply "beat him to the punch". Nate assures Rika that he will find her, and she replies that she will look forward to it. As they watch her sail away, Eddy orders Nate not to say a word.[8]
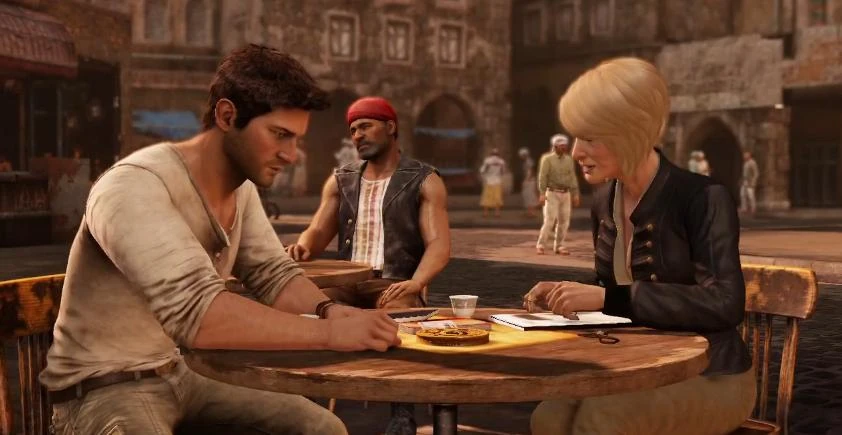
Three days later, Nate relaxes at a beach bar, telling Victor Sullivan of the recent events. Sully finds the story amusing and tells Nate that he should have known better than to have teamed up with Eddy, or any of his family, but questions how Nate now plans to find Francis Drake's coffin without any money. Nate reveals he does actually have a plan, though he will be needing Sully's help this time. Pointing to a television featuring a report by Elena Fisher, Nate tells him he is meeting her tomorrow, and the best part is that Elena's producers have agreed to fund the whole expedition. Sully laughs and says he'll believe it when he sees it.[8]
Uncharted: Drake's Fortune
Nathan in Drake's Fortune.
Nate and journalist Elena Fisher recover the coffin of Francis Drake from the ocean floor. Elena is with him to record the events for a documentary. When Nate opens the coffin, they discover a diary written by Sir Francis Drake that points to the location of El Dorado, the fabled city of gold which Sir Francis was searching for. They also learn that Sir Francis had faked his death, as there was no body in the coffin. They are saved from an attack by Eddy Raja's pirates by Victor Sullivan in his seaplane, the Hog Wild.[9]
Back on land, Sully and Nate leave Elena behind as they travel to the Amazon, where they find the ruins of an ancient South American civilization, and clues that El Dorado is a large gold statue, and that it was removed long ago by the Spaniards. Searching further, Nate and Sully discover a long-abandoned German U-boat stuck in a river containing its dead crew and a missing page from Sir Francis Drake's diary that points to a southern tropic island where El Dorado was likely taken.[9]
Before they can leave the island, Nate and Sully encounter Gabriel Roman, another treasure hunter who has hired the services of mercenaries led by Atoq Navarro, Roman's lieutenant and an archaeologist with knowledge of the statue. Roman then shoots Sully in the chest and Nate escapes.
As he escapes, he encounters Elena, and they then head to Sully's plane and fly to the island marked in Francis Drake's diary.[9]
Having been shot down over the island and separated from Elena, Nate works his way to a fort where he spots Elena's parachute. He is soon captured by Eddy's pirates and imprisoned in the fort. Elena rescues Nate and they flee. The two work their way through a long-abandoned port city and discover, through a log book in the city's customs house, that the statue was moved further inland. Soon after, Elena spots the supposedly dead Sully working with Navarro and Roman, who are heading north. They decide to follow them to the monastery. There, they rescue Sully, who survived thanks to Francis Drake's journal blocking the bullet.[9]
The trio find a series of catacombs beneath the monastery. In these tunnels, Nate overhears an argument between Navarro, Roman, and Eddy, who was hired by Navarro in order to aid in the capture of Nate and the security of the island all with the reward of a share of the gold of El Dorado. Roman doubts Eddy's abilities to do his job further and ignores his superstitious claim that something cursed on the island is killing his men. Roman dismisses Eddy and his crew.[9]
Now separated from Sully, Nate and Elena find a passage leading to a large treasure vault. There, they find Sir Francis Drake's body. Nate realizes that he died on the island, not having found the treasure. Nate leaves Francis' ring with his corpse, and tells Elena that it's time to leave the island. Before they move on, they encounter Eddy running for his life, chased by the Descendants: mutated humans possessing incredible speed and strength. After Eddy is killed by the creatures, Nate and Elena escape and find themselves in an abandoned German submarine base. Nate ventures out into the base to restore power to allow them to leave. During his exploration, he discovers that the Germans had sought the El Dorado statue during World War II but, like the Spaniards before them, were mutated by the statue. Sir Francis, knowing the statue's power, was actually trying to keep it on the island, before he too was killed by the descendants.[9]
Nate attempts to return to Elena, but finds that she has been captured by Navarro and Roman. As Nate follows them, he reunites with Sully outside of the monastery. In a catacomb the monastery, Nate and Sully are captured at gunpoint and find that Navarro and Roman have the statue. Navarro urges Roman to open it; inside is the Mummy of El Dorado. As Roman opens the statue, he inhales an airborne virus that is carried by the rotting corpse and begins to mutate. Navarro shoots the mutating Roman, and reveals that he had planned all along to steal the statue and sell the virus as a biological weapon. Navarro then has the statue lifted out by helicopter as his mercenaries are attacked by the Descendants.
Whilst Sully covers him, Nate makes his way to the statue and grabs onto the net holding it just as it is being lifted skyward. A mercenary notices Nate and informs Navarro that he his hanging off the net. One of Navarro's mercenaries attempts to shoot Nate off the helicopter, but is kicked off by Elena. The mercenary unintentionally kills the pilot, causing the helicopter to crash land on a tanker ship. Nate and Navarro fight, and Navarro is knocked unconscious. After Nate pulls an injured Elena from the helicopter, Navarro regains consciousness and about to kill them both when Nate pushes the helicopter off the tanker. The rope connecting the helicopter to the statue, which has become tangled around Navarro's leg, plunges both Navarro and the statue into the ocean.[9]
Nate and Elena lean in to kiss but are interrupted by Sully, who arrives on a small speedboat, with several boxes of treasure that he took from pirates who were "too dead to care." Elena gives Nate Francis Drake's ring, saying that she took it because she thought he might miss it. She reminds Nate that because she lost her camera, he still owes her a story. As the boat sails towards the horizon, Nate assures her he's "good for it."[9]
2007–2008
Three years prior to The Fourth Labyrinth, Nate decides to branch out with his treasure hunting by working for different people. Ecuadorian drug runner Ramón Valdez hires Nate to retrieve the Staff of Ayar Manco from Pacariqtambo. Once Nate delivers it to him, Valdez betrays him and Nate barely makes it out of Ecuador alive.
Uncharted 2: Among Thieves

Nathan in Among Thieves.
About at least a year or two after the events of Drake's Fortune, Nate is offered a job by Harry Flynn and Chloe Frazer: stealing an oil lamp from the Istanbul Palace Museum's Marco Polo exhibit. Initially, Nate is reluctant, knowing that three people had attempted to steal something from the museum, with two of them dying and the third, Nate, barely making it out alive. However, after realizing that it may lead to the Marco Polo's lost fleet, and the Cintamani Stone, a great treasure said to grant invincibility, Nate accepts the job. The three plan to double-cross Flynn's employer and keep the reward for themselves. Nate is later joined by Chloe in his room, and they plan to run away together when the job has been completed.[10]
During the heist, Nate breaks open the lamp to uncover blue resin and a blank piece of paper. He burns the resin which reveals a hidden map on the paper. Flynn then double-crosses Nate, who, despite his efforts to flee, is arrested and imprisoned for three months before Chloe, who was also betrayed by Flynn, asks for Victor Sullivan to help bail him out. Sully uses Nate's remaining cash from their El Dorado expedition, and a good deal of his own, to get Nate released.[10]
Flynn and his employer, Serbian war criminal Zoran Lazarević have discovered the remains of Polo's fleet in Borneo. They travel there, and with Chloe working within Lazarevic's camp as a mole, manage to discover the remains of Polo's crew in a series of caverns. In the caverns, they discover the Phurba, a golden dagger which will grant entrance to the fabled city of Shambhala. They also find a clue that points towards a temple in Nepal. They are ambushed by Flynn, who learns of the Nepalese temple. After they narrowly escape, Sullivan decides that the quest is too risky for him to carry on. Nate and Chloe arrive in Nepal, finding that Lazarević and his soldiers have plunged the city into a civil war, if not the brink of it, as they look for the temple.[10]
En route to the temple, Nate and Chloe run into Elena Fisher and her cameraman Jeff, who are attempting to prove that Lazarević is alive. He had been presumed deceased following a NATO bombing raid which caused severe scarring to his body. The four reach the temple and discover that the stone and Shambhala are in the Himalayas. Just as they are about to leave, the group is ambushed outside the temple, and Jeff is severely wounded. Despite Chloe's insistence to leave Jeff behind, the group pushes on further until they are finally caught by Flynn and Lazarević. Chloe reluctantly pulls her gun on Nate to protect her "cover", while Lazarević executes Jeff. Lazarević and Chloe then leave for a train, but Nate and Elena manage to narrowly escape just as Flynn and the soldiers are about to kill them. The couple rushes to the train yard and catch up with the train on a stolen jeep.[10]
Nate boards the train, and after fighting his way through Lazarevic's lines of defense, comes across Chloe, who is upset about how Nate had insisted that they take Elena and Jeff along with them earlier. She refuses to go with him, instead telling him to get off the train, and as the two argue Flynn arrives and shoots Nate in the abdomen. As he is about to fire again and kill Nate, Chloe causes Flynn's next shot to miss Nate by pushing his arm aside. Nathan takes the opportunity to flee back through the train. Badly wounded whilst being pursued by Lazarević's soldiers, Nate shoots a pile of propane tanks, causing several of the train carriages to derail and crash over the edge of a cliff.
Nate escapes the crashed train and trudges through a snow storm, eventually falling unconscious due to his wounds and exhaustion. He wakes up in a Tibetan village, where he is reunited with Elena and is introduced to an elderly German man named Karl Schäfer. Schäfer tells Nate that the phurba is the key to finding Shambhala, but Nate tells Schäfer he is no longer interested. Schäfer sends Nate and a villager, Tenzin, to find the remains of the men in Schäfer's expedition, who were looking for Shambhala and the stone 70 years earlier.[10]
They find the expedition inside a huge temple, hidden in a series of ice caves. Nate and Tenzin discover that Schäfer's men were SS members on an Ahnenerbe expedition. After seeing what had become of them after they ate the blue resin, Schäfer had killed them to protect the world from the power of the stone. Nate and Tenzin are attacked by yeti-like creatures as they escape from the temple. They return to find Lazarević's men attacking the village.[10]
After securing the village, Nate and Elena find out that Schäfer has been kidnapped and the couple track Lazarevic's convoy to an abandoned monastery. The two locate a mortally wounded Schäfer, who tells Nate that he must destroy the Cintamani Stone. They uncover the entrance to Shambhala, but are taken hostage by Lazarević, who forces them to take him into the city. On the way, they are attacked by the yeti-creatures from the ice temple. Lazarević kills one of them and reveals it to be a mutated human in a yeti suit; transformed after eating the blue resin. Lazarević describes it as a "Guardian" - a scarecrow to frighten trespassers. As they enter the city, the group are attacked by another wave of Guardians. In the chaos, Nate, Elena, and Chloe escape.[10]
Inside the city, they discover that the "Cintamani Stone" is in fact the petrified blue resin of the Tree of Life. Nate has seen the damage that the resin has already done, and decides that Lazarević must be stopped before he can harness its power. As they prepare to go after Lazarević, a badly wounded Flynn arrives and detonates a grenade, killing himself and seriously wounding Elena. Nate leaves Elena in Chloe's care and sets off to confront Lazarević at the base of the tree. Nate arrives just as Lazarević drinks the tree's sap, which heals his scars and renders him nearly indestructible. Detonating the pockets of explosive resin in the tree, Nate defeats Lazarević and leaves him to be killed by the Guardians. Nate reunites with Chloe and Elena and they escape the city as a series of explosions begins to destroy Shambhala.[10]
Back in the village, Chloe asks Nate if he loves Elena. He does not deny it, and Chloe bids Nate goodbye as Sully carries a recovering Elena over to him. While Sully chases after Chloe, Elena and Nate pay their respects at Schäfer's grave before embracing. They share a kiss and together they walk over to the edge of a cliff and watch the sunset behind the mountains as Nate mentions that he is afraid of clowns.[10]
2009–2010
Nate and Elena marry in unknown circumstances. However, Nate's phobia of commitment and lust for adventure places great strain on the marriage, and the two separate, becoming estranged. Elena keeps her wedding ring, and Victor Sullivan looks after Nate's without his knowledge.
Uncharted 3: Drake's Deception

Nathan in Drake's Deception.
Nate and Victor Sullivan head to the Pelican Inn, a pub in London. They meet with Charlie Cutter and Talbot to sell Francis Drake's Ring. Nate and Sully decide that Talbot's money is counterfeit, and a brawl ensues. Cutter and his thugs gain the upper hand, and subdue Nate and Sully. Katherine Marlowe arrives and takes Francis Drake's ring from Nate. Cutter then shoots both Nate and Sully, angering Marlowe who leaves the scene with Talbot.[4]
When Marlowe leaves, Nate and Sully get up, having faked their deaths, and it is revealed that Cutter is in fact working with them. The three meet up with Chloe Frazer, who directs them to the warehouse that Marlowe went to following the shooting. From the warehouse, they follow underground tunnels to a secret library, where they find the journal of T. E. Lawrence, Francis Drake's cipher disc, and a map.[4]
Nate learns that Sir Francis Drake along with John Dee were hired by Queen Elizabeth to go Arabia to look for a lost city: "a city of immeasurable wealth" - The Atlantis of the Sands. He had also been documenting sites that he went to, the only two that were documented by him and the crusaders, who were also looking for the lost city, were in France and Syria.[4]
Nate and Sully travel to France to investigate the chateau. There, they find half of an amulet. They express hope that the other half is in Syria. As they leave, they are attacked by Talbot and his men, who take the amulet and set the chateau on fire. They escape the burning building and travel to Syria, suspecting that Chloe and Charlie will also be ambushed.[4]
The four reunite in a castle in Syria, where the find the second half of the amulet. However, Talbot again ambushes them and takes the amulet, along with Lawrence's journal. While escaping, Cutter's leg is broken, and he and Chloe decide to sit the rest of the adventure out. Nate and Sully travel to Yemen, where they meet up with Elena Fisher.[4]
Elena gives the pair journalist permits, allowing them access to the city. She is dubious of Nate's true motivations and expresses her concern for Sully, but Nate is more interested by the fact that she is still wearing her wedding ring from their estranged marriage. She claims it 'helps in this part of the world'. Nate spots Talbot, and manages to get Lawrence's journal back off him in a fight. They quickly duck off the streets and into a hidden underground tunnel system. After navigating their way through a series of puzzles they are shown a map of star constellations, which pinpoints the Atlantis of the Sands. As the only one who can read the star chart, Sully notes the location of the city. As they leave the area, Talbot drugs Nate. Hallucinating, Nate pushes Sully and Elena away and follows Talbot's voice until he finally blacks out.[4]

Nate and Marlowe in Yemen.
When he wakes up, Nate is confronted by Marlowe, who begins recounting his life in detail. Nate acts as if he doesn't care, but is terrified to see that Marlowe has full details on Elena. Marlowe promises that nothing will happen to her, if he helps them locate Sully. When Nate refuses, Marlowe goes on to explain that Sully hasn't tried to find him, and that "Victor is only ever in it for Victor."
Despondent, Nate sits in silence as Talbot informs Marlowe that they have apprehended Sully. Nate chases Talbot through the streets and buildings of Yemen's market district, eventually catching up with him in a private garden. After a brutal fight, Nate is knocked out by the pirate Rameses.[4]
Nate is taken by Rameses to a ship graveyard, which the pirate has been using as his base of operations. He tortures Nate so that he can learn the location of Iram for himself, but when Nate refuses to break, he says that he will torture Sully instead. Nate breaks free, and navigates his way through the graveyard to Rameses' cruise ship - The Seaward. In the hold, Nate learns that Rameses never had Sully, it was a ploy to get him to talk. Nate causes an explosion which tears a hole in the ship's hull, and he barely escapes as it sinks. He is washed ashore in Yemen.[4]
He makes his way to Elena's apartment. Elena is overjoyed to see Nate, believing that he was dead. She leads him to the sofa where he rests his head on her lap. She updates him on Sullivan's situation: he, Marlowe, and her crew are in a convoy heading into the desert. Marlowe had a two day start, so catching up to them on foot or motor vehicle would be impossible. Elena discovered that an airplane would be making a supply drop to the convoy, so she planned on sneaking onto the plane, dropping in on the convoy, and rescuing Sullivan. Since the plane wasn't taking off until dawn, Elena insisted Nate rest. Nate asked Elena if she planned on rescuing Sullivan by herself, to which she replied she'd do anything to save him. Nate tells her that he likes the way she thinks. As he drifted off into sleep, he took Elena's hand (the one with the wedding band still on it) and apologizes to her, to which she simply responds "I know."[4]
The next morning, Nate manages to get aboard the cargo plane, while Elena remains behind. Hours later, as the plane flies over the Rub' al Khali desert, he is found by one of Talbot's thugs. In the ensuing fight, the plane is badly damaged. It rips apart, and Nate is sucked out. He manages to grab a cargo container mid-air and deploys its parachute, which carries him safely to the ground.[4]
Nate treks through the desert for days, suffering from exhaustion and dehydration. He experiences multiple hallucinations, before finally arriving at a ghost town. He finds that Marlowe's men have occupied the town, and is rescued by a Bedouin tribe. Salim, the Sheikh of the tribe takes Nate to his camp, telling him that his scouts have been tracking Marlowe's convoy for two days. Nate explains how Marlowe has Sully and in turn explains that Sully knows the location to the lost city of Iram. Salim tells Nate that the city was cursed three thousand years ago when Solomon took control and commanded the power of the spirits of Djinn. Afterwards, many Djinn rebelled and Solomon imprisoned them in a brass vessel which was drowned in the city's central cistern.[4]
With Salim's help, Nate rescues Sully from the convoy and they enter Iram. Upon entering, Nate drinks some of the city's water, and experiences a hallucination in which Talbot kills Sully, in the hallucination Nate wants to make him regret revenge. When the hallucination ends, Nate realizes that the water's contaminant is what Talbot and Marlowe want - Solomon's vessel of brass. He also realizes that is what Sir Francis Drake was sent after by the queen, although once he realized what he was searching for he abandoned the mission, lied to the queen, and then hid all evidence of his voyage.[4]
Nate and Sully manage to destroy the winch that is being used to retrieve the vessel, and by doing so cause the city to crumble and sink into the desert. Marlowe is trapped in the quicksand, but persuades Nathan to help her escape. He is unable to reach her, and she dies, taking Francis Drake's ring with her. Nate and Talbot engage in a knife fight. Nate used his pistol to kill Talbot and save Sully. After Nate emerges victorious, he and Sully escape the city on horseback with Salim.[4]
Nathan and Sully arrive at an airport, preparing to leave Yemen. Sully takes a moment to tell Nate that "we don't get to choose how we start in this life; real greatness is what you do with the hand you're dealt." He gives him his wedding ring and tells Nate that he has been carrying it around for too long. Elena arrives at the airport and tells Nate that she is sorry about Drake losing Francis Drake's ring. Nate tells her that he traded it for "something better", letting her see that he is wearing his retrieved wedding ring. The two leave Yemen together, with Sullivan, hand in hand. Sully leads them to a new plane, modeled after the Hog Wild which Nate and Elena destroyed during the events of Drake’s Fortune.[4][9]
Uncharted 4: A Thief's End

Drake, after waking up on an unknown shore.
Three years after his last adventure, Nate has settles into a normal life with his wife Elena in a suburban home in New Orleans (nevertheless he had repented as much as Elena in the third part of the game and there were still remnants of his old obsession as he is seen throughout the game picking up objects, surprising himself in his inventions and making some excuses). He is now working as a diver for a local salvage company owned by his boss Jameson. After successfully salvaging a sunken train car with its cargo intact, Nate was offered a salvage job in Malaysia by Jameson which he declines due to the lack of legal permits required.
Later that day, Nate joins Elena for dinner and the two exchange their day. While listening to Elena, Nate remembers his past life as a fortune hunter and stops listening. Elena then assumes he is troubled about the Malaysia job and after a discussion and some playtime, the two share a kiss.
Sometime later, as Nate works in his office, he is visited by his brother Sam whom he thought was shot and killed in a Panamanian prison escape fifteen years prior. After Nate tells Sam of his previous exploits and adventures, Sam narrates how he had escaped the prison. His cellmate, drug lord Hector Alcazar breaks him out in exchange for half of Henry Avery's lost treasure. Sam then forces Nate back into his former life of fortune hunting in order to save his brother. Just before they leave, Nate lies to Elena that he had taken the Malaysia job.
Sam presents Nate with a promising lead on Avery's treasure, a cross of Saint Dismas, similar to the one they had found in the Panamanian jail fifteen years ago, but intact and is being sold for auction in the Rossi Estate in Italy. Nate and Sam head to the estate with help from Nate's mentor, Victor "Sully" Sullivan whom Nate hasn't seen or talked to since their last adventure. Sully secures their invitation to the auction and they plan to steal the cross before it is put up for auction. However, before they could get the opportunity to do so, the order was changed and the cross was suddenly put up for auction. Nate and Sam plan to kill the power in order to steal the cross from the display.
Meanwhile, Sully bumps into Nadine Ross, head of private military army Shoreline and Rafe Adler, a rich fortune hunter who was with Nate and Sam in the Panamanian jail looking for clues to Avery's treasure. Sully learns that Nadine and Rafe had partnered and are aiming to outbid everyone to get the cross. Sam impersonates a waiter in order to get as close to the cross as possible. Just as Nate arrives in the power room, the bidding for the cross starts. Sully tries to outbid Rafe in order to buy time for Nate to kill the lights.
Once the lights go out, Sam steals the cross and he and Sully leave the room, just before the emergency lights turn on. Nate exits the power room and makes his way to Sam and Sully while trying to avoid security. En route, he encounters Nadine and she immediately and swiftly subdues Nate, demanding the cross. Nadine unintentionally throws Nate out of a window and he makes his way to Sam who is pinned down by security in the auction room. After fighting their way through security, Nate and Sam are rescued by Sully in a limo and they escape the Estate and head to their hotel. Once at the hotel, they break open the cross and find a paper that points to a specific grave near the Saint Dismas cathedral in Scotland.
Nate and Sully in Madagascar.
The three head to Scotland in Sully's Hog Wild seaplane. The Saint Dismas cathedral area is now owned by Rafe Adler who had purchased the area after recovering the previous cross in the Panamanian prison fifteen years ago. The cathedral is now a dig site occupied by Shoreline mercenaries while the adjacent graveyard is untouched. Nate and Sam make their way to the graveyard and find a grave that fits the description found on the paper in the cross. After finishing a test, the grave points them to a cave underneath the cathedral.
Nate and Sam make their way through the cave, pass tests and eventually find themselves in a chamber with a scale that has a jeweled cross on one end and a pile of coins on the other. Picking up a coin from the pile the two pass the test and a map of Madagascar is shown pointing to King's Bay. Nadine enters the chamber and Sam tricks her into picking up the cross, setting off a trap. The brothers fight their way out of the cathedral and make their way to the plane and head straight for Madagascar.
The coin is minted with a mark of a volcano that coincides with a volcano near King's Bay. Nate, Sam and Sully make their way to the volcano and find towers marked with the sigils of pirate captains from Avery's time. They eventually find a tower marked with Avery's sigil and discover the map that reveals the locations of all twelve towers and their sigils. Using the coin, which is also minted with a sigil, they narrow the best possible location of Avery's treasure to two towers on opposite ends of King's Bay. The trio split, with Sam headed to Joseph Farrell's tower and Nate and Sully headed to Edward England's tower.
Nate and Sully solve the puzzles in their tower and learn that theirs is the correct tower. However, they didn't find the treasure but they found only a map marked with Pro deus qoud licentia. Before Sam could make his way to Nate and Sully's tower, Rafe calls Nate and informs him that he hacked their phones to get their location and Shoreline mercenaries ambush the three in their towers. Nate, Sully and Sam are chased all though out the city and countryside by mercenaries until they finally lose them and meet up at their motel room.
The Latin cipher Nate and Sully discovered points to the existence of Libertalia, the legendary pirate utopia which was likely founded by Avery and the eleven other pirate captains he had recruited. Just before they could leave, Nate is confronted by Elena, who is emotional over Nate lying to her about the Malaysia job and Sam's existence. Elena walks out on Nate and is followed by Sully who stays back to watch on her.
Nate and Sam continue on to head towards an island that was pointed out in the map they had discovered. On the island, they solve elaborate puzzles which points them to another, larger island where they hope Libertalia is located. Just as they were about to leave, Rafe and Shoreline mercenaries arrive and a storm brew. Nate and Sam race towards the larger island while being attacked by Shoreline vessels. Before they could reach the island, their boat is rammed by a larger Shoreline ship, separating Sam and Nate and marooning them both on the island.
Nate awakes in the middle of the storm and attempts to make his way to Sam until he passes out. The storm passes and Nate wakes up to a Morse code signal from Sam. He climbs and fights his way through the island jungle and eventually reunites with Sam. Nate expresses his concerns over Sam's obsession with finding the treasure, what he had sacrificed and that his feelings about giving up. Then they suddenly discover the remains of a civilization and later find themselves standing in the commercial district of Libertalia. Sam expresses his excitement for the discovery and they make their way to the treasure building. On the way, they find clues about a rebellion and a civil war that deserted the legendary pirate utopia.
When they arrive at the treasure building, they treasure was no longer there. According to manifests and evidences, Nate and Sam conclude that the twelve pirate captains who were the founders of Libertalia stole from the colonists and kept the treasure for themselves. They also concluded that the most likely place the founders took the treasure is to a place called New Devon, the residence of the founders, in the northern part of the island. As they make their way to a tall tower, they are ambushed by Shoreline mercenaries who destroy the tower and Nate and Sam are confronted by Nadine who single-handedly hustles the two Drakes.
Just as the brothers get the upper hand, Rafe and other mercenaries arrive. After attempting to strike a deal, Rafe reveals that he was the one who had freed Sam from prison and that Hector Alcazar has been killed over six months prior. Furious, Nate still attempts to bargain with Rafe to let them go home. However, Rafe intends to execute Nate but shoots Sam instead who takes the bullet for Nate, but not before he accidentally pushes his younger brother off the cliff, in which Nate hits his head on one of the rocks, knocking him out as he falls into the river.
Unconscious, Nate awakes to find that he is found by Elena, who had changed her mind about walking out on her husband and followed him to the island with the help of Sully. Nate finally reveals his true identity and past to Elena and the two head to New Devon where Sam is likely to be taken. On the way, the two reconcile about their marriage and remember their promises to each other not to go back to a life of fortune hunting.
When they arrive at the walls of New Devon, they find hundreds of colonists who were imprisoned in gibbets by the founders for acts of rebellion. Once they scale the wall, they find the place completely flooded and deserted. While traversing through some of the pirate captain's individual residences, Nate and Elena learn that after squashing the rebellious colonists, the founders turned on each other for the treasure. Upon arriving at the residence of Thomas Tew, second-in-command of Henry Avery, Nate and Elena find the corpses of the ten founding pirate captains who were invited by Tew to 'abandon their animosities' and were subsequently poisoned by Tew and Avery, who wanted the treasure for themselves.
They finally arrive at the residence of Henry Avery, where Nate and Elena find a letter that suggests Avery and Tew turned on each other for the treasure. They find footprints, left by Shoreline mercenaries and Sam, and follow them through the catacombs beneath Avery's mansion. Avoiding traps set by Avery to prevent anybody from following him to the treasure, they follow the catacombs to a ship graveyard where a fight ensues between Sam and Shoreline mercenaries.
Nate and Elena reunite with Sam, then later with Sully and they plan to leave while they can. A reluctant Sam begs Nate that they go and find the treasure, assuring a safer shortcut to Avery's ship which is located on a cove underneath the mountain. Nate ultimately refuses to which Sam finally agrees to and the four head towards Sully's plane which is docked nearby. However, an accident causes Sam to be separated from the group and against Nate's orders, Sam leaves to find the treasure.
Nate, Elena, and Sully chase after Sam but after another accident, Nate is forced to go alone and leave Elena and Sully behind. Nate chases after his brother up and inside the mountain and eventually spots the grounded Fancy, Avery's ship, inside the mountain in its cove. He overhears a conversation between Nadine and Rafe with the former expressing doubt over recovering the full haul of Avery's treasure since she had lost so many men on the island. After attempting to leave with a box full of gold, her own mercenaries turn on her and side with Rafe and he demands that they board the ship to recover the full haul to which Nadine complies. Sam steals one of their boats and arrives at the ship first, followed by Rafe and then later Nate.
A trap inside the ship explodes, setting the ship on fire and killing most of the remaining mercenaries. Nate arrives in the ship's treasure hold and finds Rafe and Sam, who is stuck underneath a collapsed beam. Nate begs Rafe to help him save Sam so they could go home. Nadine arrives, disarms both Rafe and Nate and points out to the corpses of Avery and Tew who had killed each other for the treasure and says that obsession over the treasure will land them the same fate as the two men. Nadine leaves the three inside the burning ship hold and Rafe, furious over Nate and Sam's achievements, engages Nate in a duel.
Rafe eventually gets the upper hand but Nate kills Rafe by dropping a pile of treasure over him. Nate then blows up a hole in the ships hold, flooding the area in order to lift the collapsed beam and free Sam. They swim through the hole and escape the collapsing ship and cove, making it to safety outside where Elena waits for them and are picked up by Sully. They head back to Madagascar where Nate and Sam part ways. Nate fully retires to a life with Elena and Sam partners with Sully.
Sometime later, Jameson informs Nate that he is selling his company to him. Elena arrives and tells Nate that they are buying the company using Libertalia coins Sam had managed to sneak from the hold. Elena also reveals that a normal life isn't for them and that she missed the adventure. Using the company and the money, she will attempt to resurrect her old show and go on adventures with Nate to continue treasure hunting together on a strictly legal basis. Their first adventure; the salvage job in Malaysia that Nate refused earlier.
Later years

An older Nate and Elena with their daughter, Cassie Drake.
Nate goes on to form D&F Fortunes with his wife Elena. Throughout the years following the events of A Thief's End, they have uncovered numerous archaeological discoveries and have received wide media coverage. Nate and Elena have a daughter, Cassie, named after Nate's late mother, Cassandra Morgan. Their daughter grows up to share the same interests as her parents and later accompany them on their other archaeological expeditions.
Nate retains contact with Sam and Sully, and the two occasionally visit him and his family. By the time Cassie discovers his past life as a fortune hunter, Nate along with Elena share their past exploits with their daughter.
Characteristics
Appearance

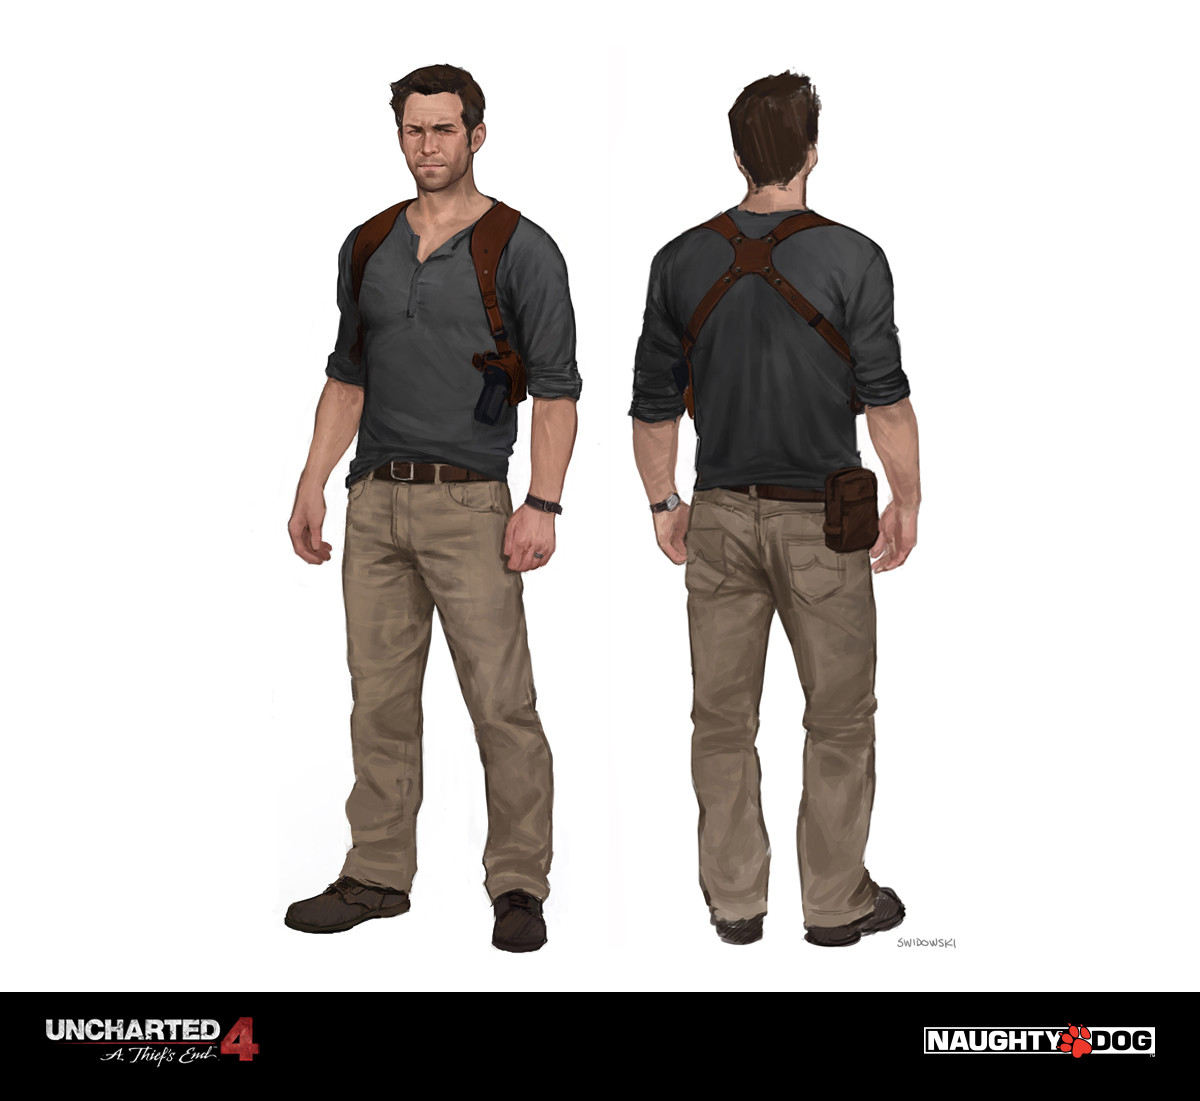
Nate is a Caucasian male, with dark brown hair and eyes which have changed throughout the games. They appear both blue and green at different points, if one looks at the in game shots in the Official Game Guide for U3. He has a muscular physique, a tan skin-tone, and is either 6'1 (North's own height) or 5'11—the latter supported by minor evidence of his mugshot stating him as six foot with shoes on. His height has never been confirmed. He has been described as "ruggedly handsome". Nate's face is square and angular, with a cleft-chin and squinty-eyes. His hair is short and spiky, and he usually sports a five o'clock shadow.
Personality
Nathan Drake's most prominent trait is his dry humor, even in dangerous situations. This can cause him to appear unprofessional, and Neil Druckmann has suggested Nate's sarcasm to be a slight front for his dark past, which he often keeps to himself, once when he becomes nervous and impatient, that may Get angry, irritated or complain. Self-educated in history and various languages, Drake is also highly intelligent. Nate is outwardly and genuinely an "everyman" type of person, relating to Naughty Dog's original intention when creating the character. Even if he is unable to remove his obsession with treasure hunting, he can contain it.
As a treasure hunter and thief, he is often confronted by various types of enemies, a prospect that doesn't always deter him. The dangers of his work are part of why Nate is drawn to it, typical of an adrenaline junkie. As a result, he has a callous and somewhat sadistic disregard for his adversaries and kills without remorse, albeit in self-defense. However, he is against cold-blooded executions (as shown when he refused to let Sam kill Nadine, even saving her life and also in Uncharted 2: Among Thieves who complains when Flynn tries to kill them in that way) and killing defenseless enemies even offering his help to them after their defeat, such as the case with Flynn and Dante. He also refused to kill a defeated Lazarević himself to focus on escaping Shambala, though he did leave him to be killed by Shambhala's Guardians. Nate is easy to provoke, makes absurd complaints and sometimes gets violent when an enemy angers him.
Nate is extremely loyal to his friends, as he risks his life on multiple occasions just to help them. He has a slight phobia of commitment; though willing to get close to others, he simultaneously distances himself — an example being how he and Elena became estranged following their marriage until their reunion at the end of U3. The epilogue of U4 reveals they are still together some years later, and even have a teenage daughter.
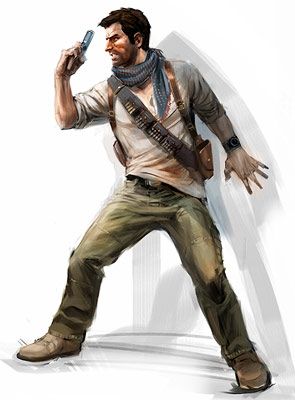
Abilities
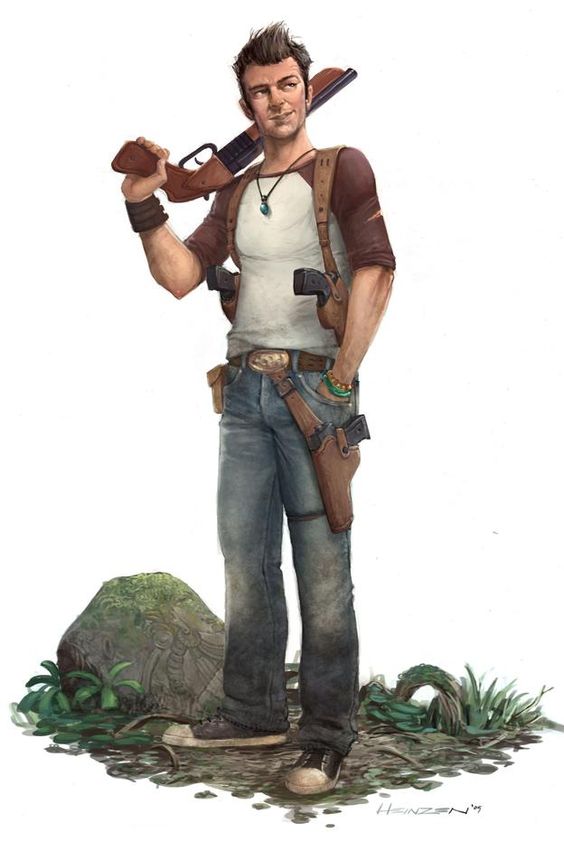
Even when he was a teenager, Drake was an incredibly skilled free runner and climber. He is able to jump from high distances without any harnesses or security, and he possesses massive upper body strength, as well as tolerance for pain. He was able to climb a derailed train despite the fact that he was shot and confused of his surroundings. Though his gunshot wound was clearly hurting him, he was strong enough to not let go. As he was a thief since his teenage years, Drake is skilled at pickpocketing, being able to steal Victor Sullivan's wallet from him. Despite Sully noticing this, Drake was still able to swipe the key he was searching for in the first place. Another example of his thieving skills was when he and Harry Flynn broke into an Istanbul museum without any of the guards noticing, until Flynn revealed his treachery and purposefully shot a glass case to attract the guards. Despite his "shoot first, ask questions later" persona, Drake is also skilled with stealth takedowns and chokeholds, being able to overpower and knock out multiple security guards without killing them. He normally stealthily snaps his enemies necks while creeping up on them.
Drake is very capable when it comes to unarmed fighting, close to being a one-man army. He is able to overpower Navarro's mercenaries and Lazarevic's soldiers despite their militaristic background and training; this also includes much larger and stronger soldiers who are more advanced in combat than he is. He is also surprisingly intelligent, thinking up the theory with the help of his older brother that Sir Francis Drake faked his death when he was only a teenager. He is also bilingual, being able to speak fluently in Latin and Spanish. He also deduced that Lazarević, who he believed was searching for the Cintamani Stone, was actually looking to drink from the sap of the Tree of Life, which would make him invincible.
Drake's main proficiency is with guns. He possesses a trained hand and is a very good marksman. He himself even remarks, "damn, I'm a good shot!" he is good with handguns, semi-automatic rifles, shotguns and even crossbows. He is also good with grenades and other explosives.
However, Drake is not invincible and can also be overwhelmed or overpowered by an opponent. An example was in the Rub Al' Khali when he was pinned down by countless of Marlowe's agents. Drake, for a moment, believed it was the end for him. He can also be injured or ambushed. An example is when Harry Flynn was able to shoot him on-board a train while he was arguing with Chloe Frazer. Though he was able to tolerate the pain from the gunshot wound, he slowly succumbed to it because of the harsh conditions. His improvised and self-made fighting style, while effective against most opponents, can be overcome by more trained and smarter combatants such as Nadine, who quickly defeated Drake in a one-on-one fight in their first encounter.
Relationships
Elena Fisher
Nate and Elena Fisher have a complicated, and later, intimate relationship, which develops into love[10] and marriage[4] over the course of the series. Nate quickly developed an admiration for Elena and her ability to handle herself in a fight, while Elena was impressed by Nate's heroism. In Uncharted 2: Among Thieves, it is implied the two were briefly together following the events of Uncharted: Drake's Fortune, but had broken up. During Uncharted 2, it becomes clear that they both still harbour feelings for each other when they unexpectedly meet again in Nepal, and they reconcile at the game's conclusion. In Uncharted 3: Drake's Deception, it is shown that Nate and Elena have married during the interim between games, and it's implied that the marriage was challenged by Nate's inability to commit to a normal life, leading to another break-up.
However, Nate and Sully call on Elena for help in Yemen, and at the end of Uncharted 3, Nate finally commits to Elena by wearing his wedding ring, and they enter a relationship once again. However, their relationship is tested again in Uncharted 4: A Thief's End, when Nate lies to Elena about finding Avery's treasure with Sam, his reasoning being that he didn't want to lose her. Many years later in the epilogue Nate and Elena are shown to still be happily married and raising their daughter, Cassie.
Victor Sullivan
Victor Sullivan has been Nate's mentor since they met in Colombia and while teaching him the nuances of treasure hunting, Sully quickly became a father figure for Nate. The two met when Nate was a teen, when Sully assisted Nate who was being chased by Marlowe's agents.[4] Sully was impressed by Nate's potential as a thief and as he was an orphan, Sully took him on as a protégé. Over the years, Nate would often call on Sully for help whenever he was in trouble.
Chloe Frazer
Nate describes his relationship with Chloe Frazer as "complicated". The two of them have history and Nate once walked out on her. Despite this, they plan to run away together in Uncharted 2: Among Thieves, although this plan is interrupted by Flynn's betrayal.[10] During Uncharted 2, Nate and Chloe's romance is challenged when they run into Elena, causing Nate to become torn between them. Nate demonstrates a great deal of care for Chloe when she is abducted by Lazarevic, as he battles unsuccessfully through a train of mercenaries to save her. Eventually, after their ordeal, Nate and Chloe part on good terms when she notices his affection for Elena.
Samuel Drake
Being his closest companions throughout his childhood, Nate obviously cared for Samuel Drake, his brother, and was visibly distraught when he was forced to leave him to die. His "death" left him emotionally scarred to the point that he avoided speaking or reminding himself about Sam, refusing to look at photographs of their childhood and not even making a mention of him to Elena. Even after finding out that Sam had lied to him about Hector Alcázar, he was instantly willing to forgive and rescue him from Rafe and Shoreline. In addition, Nate was willing to let go of Henry Avery's treasure and even sink it, just so he could save his brother from certain death.
Behind the scenes
Development

.jpg)
Early concept art of Drake.
Nathan Drake's personality was based on the stereotypical romantic action-adventure hero, with inspirations stemming from early movie serials to modern action films.[11] Creative director Amy Hennig singled out the main characteristics this stereotypical hero - an "irreverent, roguish sense of humor", and "charm."[11] Inspiration was also taken from various screwball comedies, with the aim being a game that didn't take itself quite as seriously.[11] At the 2008 Game Developers Conference, lead game designer Richard Lemarchand revealed that Nate's character was based in part on Johnny Knoxville.[12]
Lemarchand went on to say that they wanted to capture Knoxville's "coolness and goodness" in the character.[13] Amy Hennig later clarified that Knoxville was just one of the people that influenced Nate's design, with others including actors like Cary Grant.[11] She also attributed much of Drake's charm and charisma to Nolan North, saying that he was, in a way, their greatest inspiration.[11]
Lead cinematics animator Josh Scherr said that the ultimate intention with Nate was to create a character with an everyman persona; an "ordinary guy...who really had to work hard for every leap and climb, and who got visibly nervous when under fire."[14] His hand-to-hand skills are described by Sam Thompson, producer of Uncharted 2: Among Thieves, as "fallible."[15]
Senior character artist Hanno Hagedorn said (on Uncharted 3's development):
- Nathan Drake is now into his third incarnation, so we felt there were opportunities for innovations in Uncharted 3. The first thing we did was to decide how to push our ongoing focus on stylized realism for Drake. This took a number of forms in the finished model, from improved ways of creating his wet hair down to his beard stubble. Just as we did between Uncharted: Drake's Fortune and Uncharted 2: Among Thieves, we aged Drake up in accordance with the two to three years' real world difference between 2009, when we released Uncharted 2, and the year when we were going to release Uncharted 3: 2011. Drake was in his very early thirties when the first Uncharted was released, and so now he's well into his mid-thirties. If you look close enough you can just catch glimpses of a couple of grey hairs. We also made crow's feet' wrinkles around his eyes a little more pronounced. These details are very subtle, but people pick up on them subconsciously. For his beard stubble for example, we first created his beard using a hair simulation in 3D Studio Max. We gave his beard follicles a direction by grooming and combing them in the simulation, and then we exported perfectly matching normal maps, color maps and secular maps that we used on his model in the game, to give us a more detailed, more realistic look than we've ever had before. His texture map layout also has been optimized so that the new in-game model has almost the same detail resolution as the cinematic model from Uncharted 2. These are just a few examples of the countless little details we polished and refined for Drake's third outing.
Animation
A procedural blended animation system was developed to realistically allow Nate to react to his surroundings in the game.[16] Animations that felt sluggish or unresponsive were removed and alternate methods were used to create the desired effect. In some cases, over thirty animations are used to comprise a single movement.[16] Naughty Dog co-president described this realistic animation system as the "number one priority" when developing Uncharted.[16]
Other appearances
Uncharted: Drake's Trail
Drake's Trail was a web game that was exclusive to the European site for Uncharted: Drake's Fortune. It was made to promote the new series. In it, a private detective is hired by Elena Fisher to locate Nate, who is researching Sir Francis Drake and his voyages.[17]
PlayStation All-Stars Battle Royale
Nathan Drake is a playable character in the exclusive fighting game PlayStation All-Stars Battle Royale. This marks his first appearance in a game outside the Uncharted series. He can perform three special "super" moves in a match: throwing a propane tank and shooting it mid-air, pushing over a large statue and crushing his opponents, and summoning El Dorado, which opens and turns his opponents into descendants. He also has his own story in the game's arcade mode, where he and Sully are searching for treasure with the pages of the Thievius Raccoonus, a book from Sucker Punch Production's Sly Cooper franchise. As such, his in-game rival is the titular character.
Notes
Template:Reflist
References
Template:Reflist
- ↑ Timeline
- ↑ As Above, So Below
- ↑ Second-Story Work
- ↑ 4.00 4.01 4.02 4.03 4.04 4.05 4.06 4.07 4.08 4.09 4.10 4.11 4.12 4.13 4.14 4.15 4.16 Naughty Dog. Uncharted 3: Drake's Deception. (SCE Worldwide Studios). PlayStation 3. (2011).
- ↑ 5.0 5.1 5.2 5.3 5.4 5.5 5.6 5.7 5.8 5.9 Williamson, Joshua (2011/2012). Uncharted (comic miniseries). DC Comics. ISBN 978-1401232696.
- ↑ 6.00 6.01 6.02 6.03 6.04 6.05 6.06 6.07 6.08 6.09 6.10 6.11 SCE Bend Studio. Uncharted: Golden Abyss. (SCE Worldwide Studios). PlayStation Vita. (2011).
- ↑ 7.00 7.01 7.02 7.03 7.04 7.05 7.06 7.07 7.08 7.09 7.10 7.11 7.12 Golden, Christopher (2011). Uncharted: The Fourth Labyrinth. Del Rey. ISBN 978-0345522177.
- ↑ 8.0 8.1 8.2 8.3 8.4 8.5 8.6 8.7 Druckmann, Neil. Naughty Dog. Uncharted: Eye of Indra. (SCE Worldwide Studios). PlayStation 3. (2009).
- ↑ 9.0 9.1 9.2 9.3 9.4 9.5 9.6 9.7 9.8 Naughty Dog. Uncharted: Drake's Fortune. (SCE Worldwide Studios). PlayStation 3. (2007).
- ↑ 10.00 10.01 10.02 10.03 10.04 10.05 10.06 10.07 10.08 10.09 10.10 Naughty Dog. Uncharted 2: Among Thieves. (SCE Worldwide Studios). PlayStation 3. (2009).
- ↑ 11.0 11.1 11.2 11.3 11.4 Hsu, Dan (October 22, 2009). "Uncharted 2: Deconstructing Nathan Drake". Bitmob. Bitmob Media. Retrieved June 7, 2012.
- ↑ Miller, Greg (February 21, 2008). "GDC 2008: Uncharted: Johnny's Fortune". IGN. News Corporation. Retrieved June 7, 2012.
- ↑ Thang, Jimmy (February 22, 2008). "GDC 2008: Deconstructing Drake's Fortune". IGN. News Corporation. Retrieved June 7, 2012.
- ↑ Scherr, Josh (April 2, 2008). "One and One: Naughty Dog’s Josh Scherr". Wired. Condé Nast Publications. Retrieved June 7, 2012.
- ↑ Totilo, Stephen (February 9, 2009). "Sony: What's Important About 'Uncharted 2'". MTV Multiplayer. MTV. Retrieved June 7, 2012.
- ↑ 16.0 16.1 16.2 "Uncharted 2: Among Thieves, Part Four". CIO. IDG Communications Media. October 2, 2009. Retrieved June 7, 2012.
- ↑ Uncharted: Drake's Trail. (SCE Worldwide Studios). (2007)
Cite error: <ref> tags exist for a group named "note", but no corresponding <references group="note"/> tag was found